Posted At: Mar 27, 2026 - 461 Views
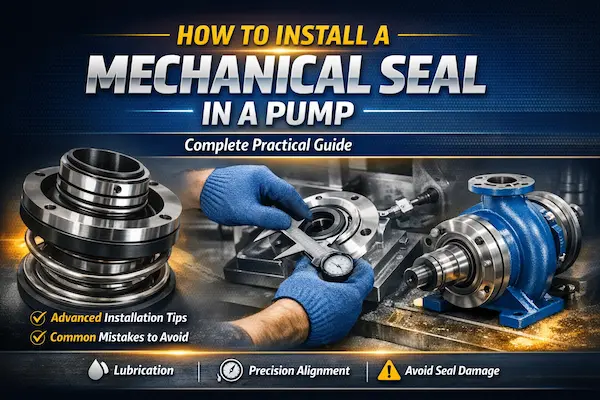
Introduction
Proper mechanical seal installation is critical for ensuring pump reliability, reducing downtime, and preventing costly leakage. While many guides explain the basic steps, real-world installation often involves challenges like shaft misalignment, improper lubrication, or incorrect seal handling.
In this guide, we’ll go beyond the basics and walk you through a practical, industry-focused approach to pump mechanical seal installation, including preparation, precision techniques, and common mistakes to avoid.
Why Proper Mechanical Seal Installation Matters
A mechanical seal is a precision component. Even a small installation error can lead to:
- Premature seal failure
- Excessive leakage
- Pump vibration and damage
- Increased maintenance costs
Correct mechanical seal assembly ensures:
- Longer seal life
- Improved pump efficiency
- Reduced operational downtime
Pre-Installation Checklist (Most People Skip This!)
Before starting the pump mechanical seal installation, make sure everything is ready:
1. Inspect Pump Components
- Check shaft or sleeve for wear, scratches, or runout
- Ensure bearing condition is good
- Verify gland plate flatness
2. Verify Seal Compatibility
- Confirm seal size matches shaft diameter
- Ensure material compatibility with fluid
3. Cleanliness is Critical
- Remove dirt, oil residues, and old gasket material
- Use lint-free cloth for cleaning
👉 Even a tiny particle can damage seal faces.
Tools Required for Mechanical Seal Installation
- Allen keys / hex keys
- Torque wrench
- Clean lubricants (as per seal type)
- Soft cloth or tissue
- Dial gauge (for precision alignment)
Step-by-Step Mechanical Seal Installation Process
Prepare the Shaft and Seal Chamber
Ensure the shaft is smooth and free from burrs. Lightly polish if required.
👉 Apply a thin layer of lubricant to:
- Shaft surface
- O-rings or elastomers
Install the Stationary Seat
- Carefully place the stationary seal face into the gland or housing
- Press evenly (never hammer directly)
- Use a soft tool if needed
⚠️ Important:
Avoid touching the seal face with bare hands — oils can reduce sealing efficiency.
Install the Rotary Assembly
- Slide the rotary unit onto the shaft
- Ensure proper orientation (spring side direction matters)
- Position it as per manufacturer setting length
Set the Seal Compression
This is where many installations go wrong.
- Adjust the seal to the correct working length
- Tighten set screws evenly
- Use torque specifications if available
👉 Incorrect compression = immediate seal failure.
Assemble the Gland Plate
- Carefully align the gland plate
- Tighten bolts in a crisscross pattern
- Ensure uniform pressure distribution
Final Alignment Check
Before starting the pump:
- Check shaft alignment
- Ensure no rubbing or abnormal resistance
- Rotate shaft manually
Advanced Tips for Better Mechanical Seal Installation
✔️ Use Proper Lubrication
- Never install seals dry
- Use compatible lubricant (water, oil, or grease depending on application)
✔️ Check Shaft Runout
- Excessive runout damages seal faces
- Keep within acceptable tolerance limits
✔️ Avoid Over-Tightening
- Over-tightening can distort seal components
Common Mistakes to Avoid
❌ Dry Installation
Leads to immediate overheating and seal face damage
❌ Touching Seal Faces
Fingerprints can cause leakage paths
❌ Incorrect Seal Orientation
Spring direction mistakes are very common
❌ Ignoring Alignment
Misalignment reduces seal life drastically
Post-Installation Checklist
Before starting the pump, confirm:
- Seal is properly seated
- Bolts are tightened correctly
- Pump is aligned
- Seal chamber is filled (no dry running)
👉 Always perform a trial run under controlled conditions.
Troubleshooting After Installation
| Problem | Possible Cause | Solution |
|---|---|---|
| Leakage after start | Improper installation | Recheck alignment & compression |
| Excessive heat | Dry running | Ensure lubrication |
| Vibration | Shaft misalignment | Realign pump |
| Short seal life | Contamination | Improve cleaning process |
When to Call a Professional
If you notice repeated seal failures even after correct mechanical seal assembly, it could be due to:
- System design issues
- Incorrect seal selection
- Operating condition mismatch
Conclusion
Successful mechanical seal installation is not just about following steps — it’s about precision, cleanliness, and understanding how each component works together.
By following this practical guide, you can:
- Improve seal performance
- Reduce maintenance costs
- Extend pump life
Frequently Asked Questions:
What is mechanical seal installation?
Mechanical seal installation is the process of properly assembling and fitting a seal into a pump to prevent fluid leakage and ensure efficient operation. Proper installation is critical for seal performance and lifespan.
What are the most common mechanical seal installation mistakes?
The most common mistakes include:
- Dry running during startup
- Incorrect seal alignment
- Improper compression setting
- Touching seal faces
- Using wrong lubrication
How long does a mechanical seal last after installation?
A properly installed mechanical seal can last anywhere from 1 to 5 years, depending on:
- Operating conditions
- Fluid type
- Maintenance practices
Can I install a mechanical seal without professional help?
Yes, but only if you have:
- Proper tools
- Technical knowledge
- Manufacturer guidelines
For critical applications, expert installation is recommended.
Why is my pump leaking after mechanical seal installation?
Leakage after installation can be caused by:
- Improper seal seating
- Shaft misalignment
- Damaged O-rings
- Contamination during installation